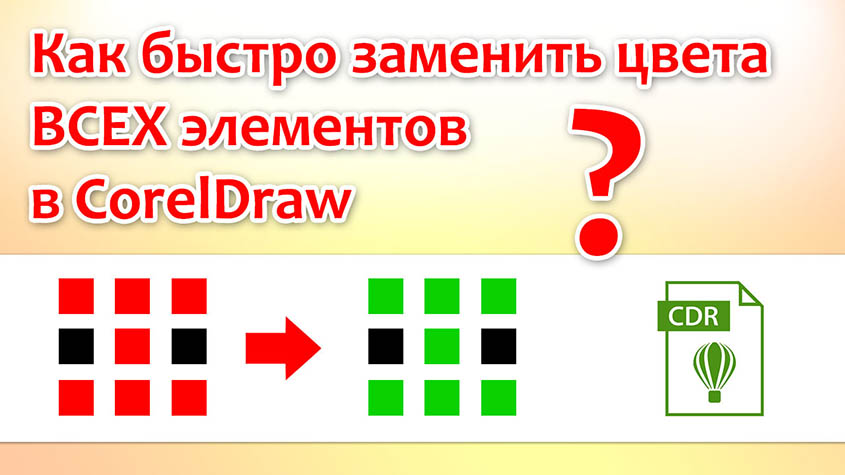
Часто перед дизайнером может стоять задача поменять цвет векторных элементов с одного на другой. А если таких элементов десятки или даже сотни? Существует ли способ автоматически перекрасить все объекты одного цвета на другой?
Да, в этой статье речь пойдет именно о таком автоматическом способе замены цвета.
К примеру, мы хотим поменять выходные дни и праздники календаря выделенные красным цветом. Заменим их на зеленый.
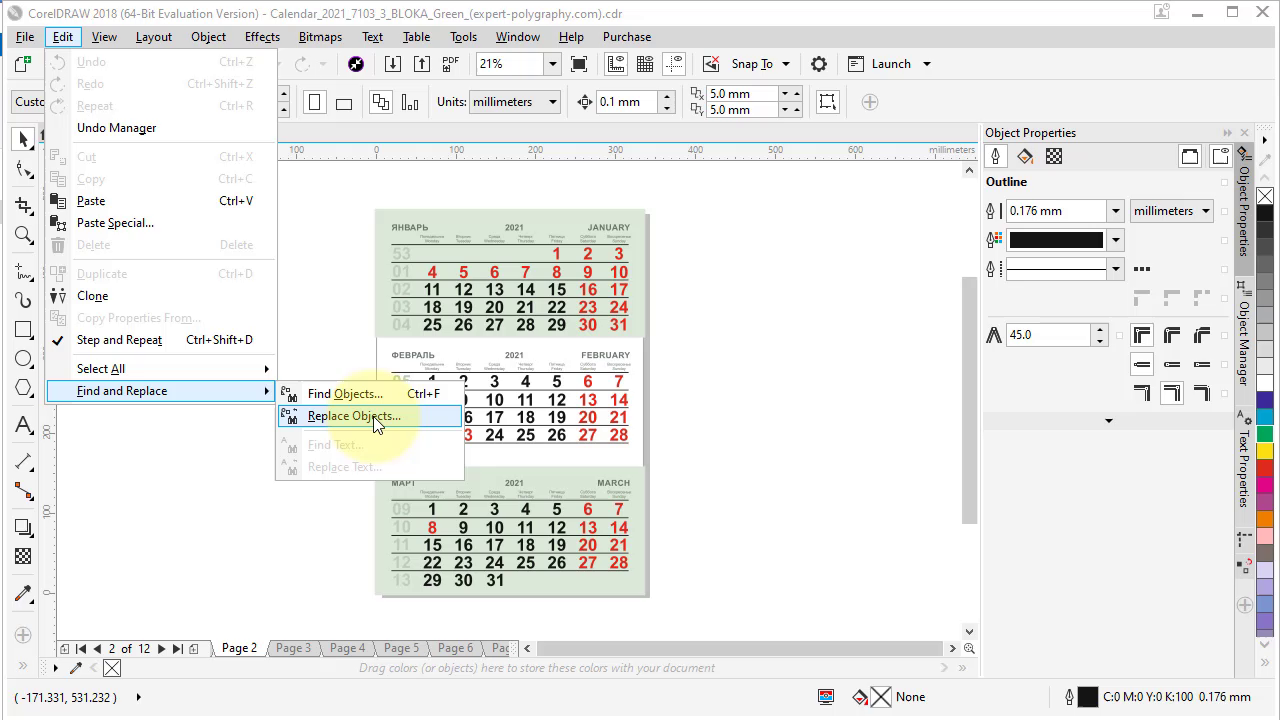
Нажмите — Edit/ Find and Replace/ Replace Object… Или в русской версии — Редактирование/ Поиск и замена/ Заменить объект…
Затем, оставьте пункт «Replace a color» (Заменить цвет) и нажмите «Next».
В следующем окне вы можете задать текущий цвет объекта с помощью инструмента «пипетка» или задать его настройки вручную. А чуть ниже, цвет, на который его нужно заменить.
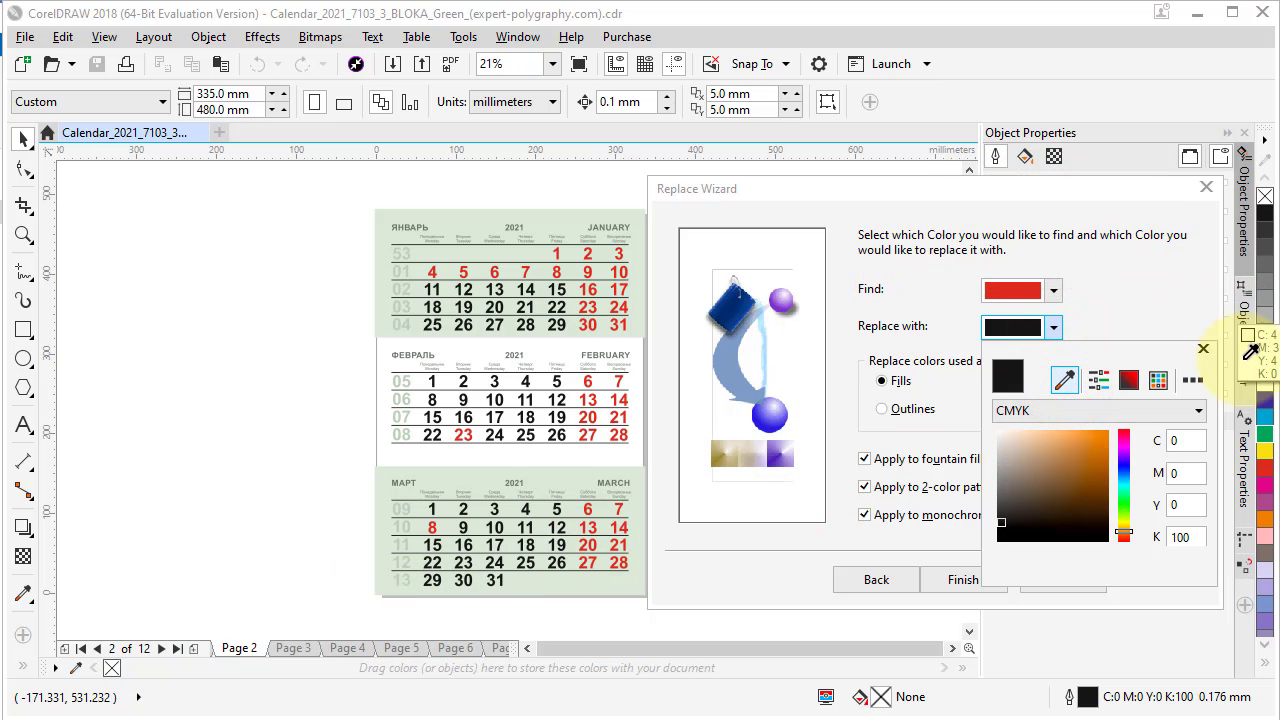
Нажимаем «Finish».
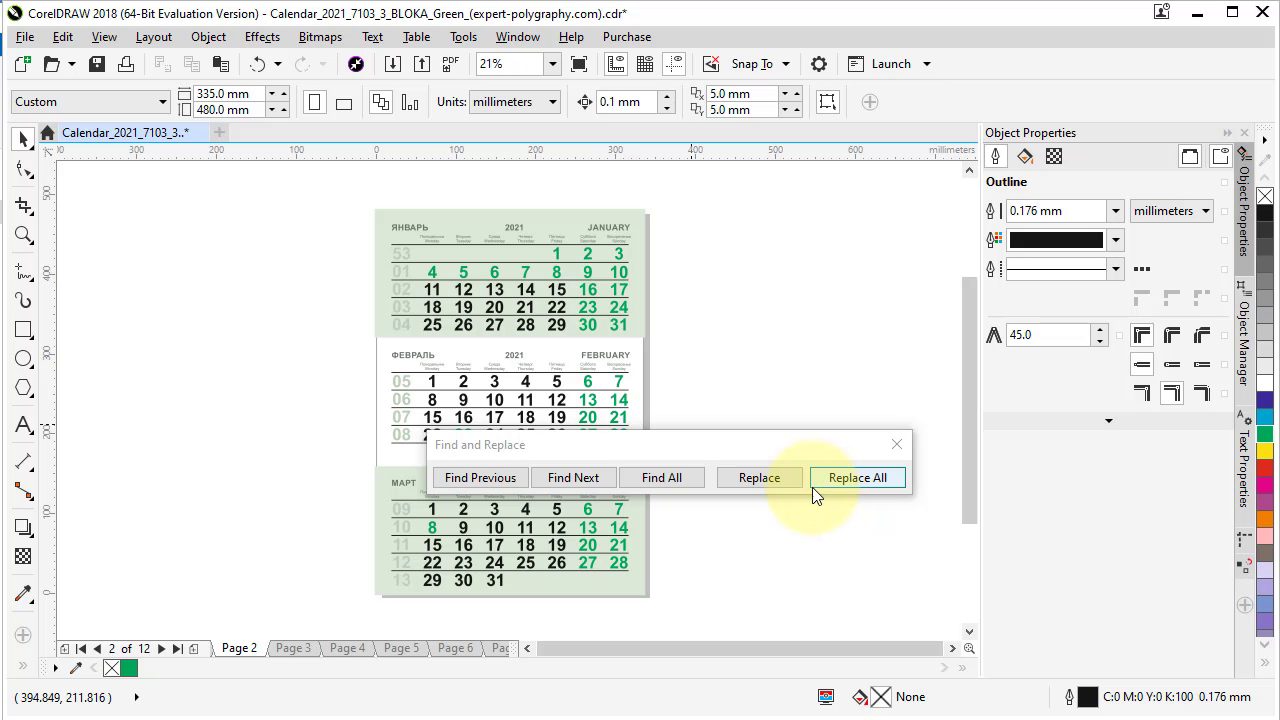
В появившемся окошке достаточно нажать кнопку «Replace All» чтобы все элементы перекрасились в новый цвет автоматически.
Если у вас в документе много страниц, на которых нужно сделать замену цвета, то действие нужно повторить на каждой.
В следующем видео уроке подробно описана вся процедура замены цвета:
Скачать календарик из видео на 2021 год можно по ссылке.
(Visited 9 167 times, 1 visits today)
Голосуем за статью!
![]() Загрузка…
Загрузка…
Although CorelDRAW is primarily used for creating vector-based graphics, you can also work with raster-based images, known as bitmaps. If you want to change the color of something, there are two different ways to do that in CorelDRAW. Let’s jump in and find which way works best for you.
Import Your Image
Open CorelDRAW and start a new project. If your intended image will be landscape, choose the landscape format, or vice versa for a portrait. Click OK once you’ve chosen your document settings.
To import your image, hit Ctrl + I (Windows) or Cmd + I (Mac) to open the import dialog box. You can also open it under File > Place.
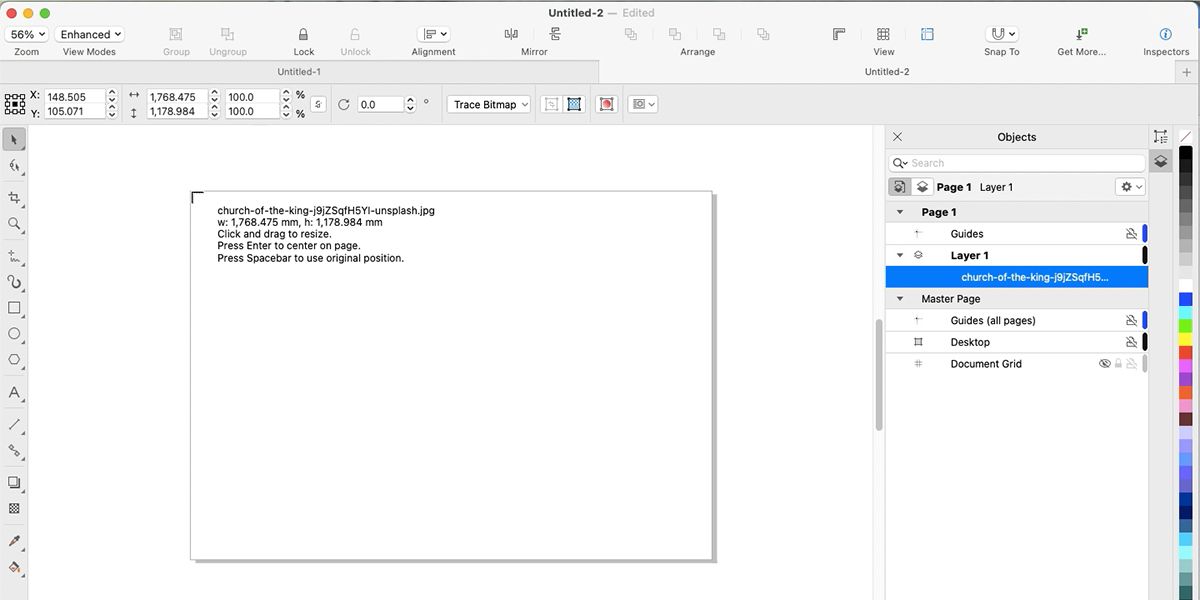
Once you’ve chosen your image, click Place. Your cursor shows the file name next to a right-angle arrow, place the arrow in the top left of your canvas then click and drag until you reach the other side of your canvas.
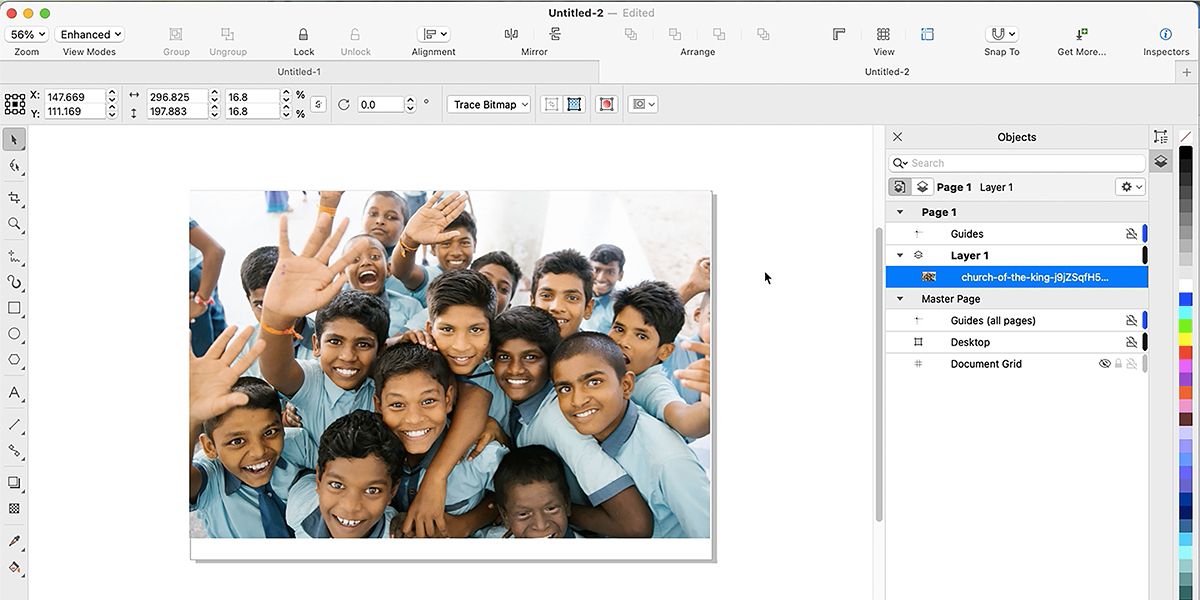
This sizes your image, so it fits inside the canvas. You could also click directly to the canvas which uploads the image at full size, so you’d have to resize it yourself.
Convert to Bitmap
If you’re using a photo as your image, you can skip this step. Most photo files are already raster-based—or bitmap images—so you won’t need to convert them to bitmap. However, if the file you’re using is vector-based, or you’re not sure of the format, you’ll need to convert it to bitmap before moving to the next step.
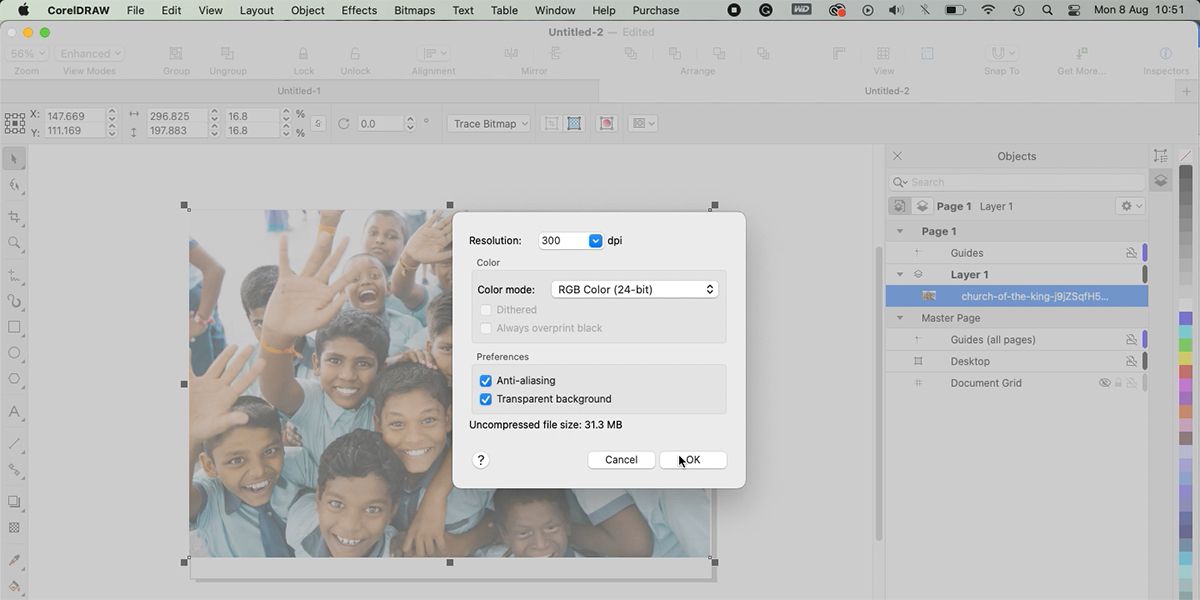
To convert to bitmap, select your image, then go to Bitmaps > Convert to Bitmap. Ensure the DPI is on 300, but the rest of the standard settings should be fine. Click OK.
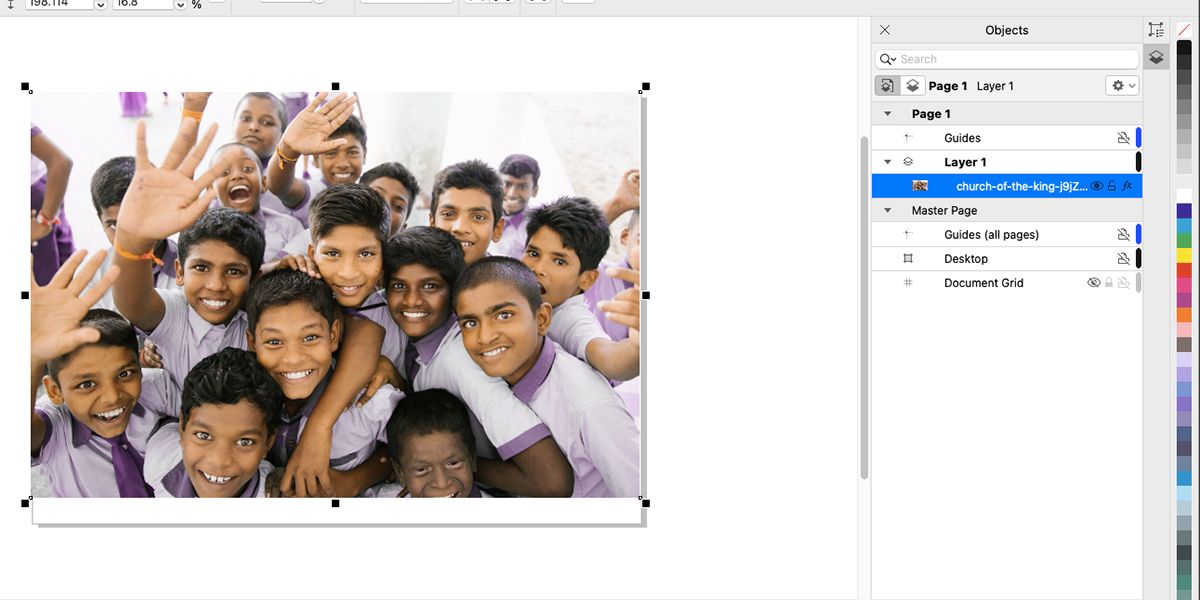
Before making any adjustments to your image, we recommend duplicating the layer as a safety guard. If your layers aren’t already open, go to Window > Inspectors > Objects.
Select the image layer in the Objects panel. Right-click the layer, choose Copy, and then hit Ctrl + V (Windows) or Cmd + V (Mac) to paste the new duplicated layer. You can work on the duplicated layer without making any destructive changes to the original; however, both techniques we’ll be working with today are non-destructive.
Technique 1: Selective Color
There are two different ways you can replace colors in your image in CorelDRAW. Depending on the color in question and how prominent it is in your image, one of these techniques may work better than the other.
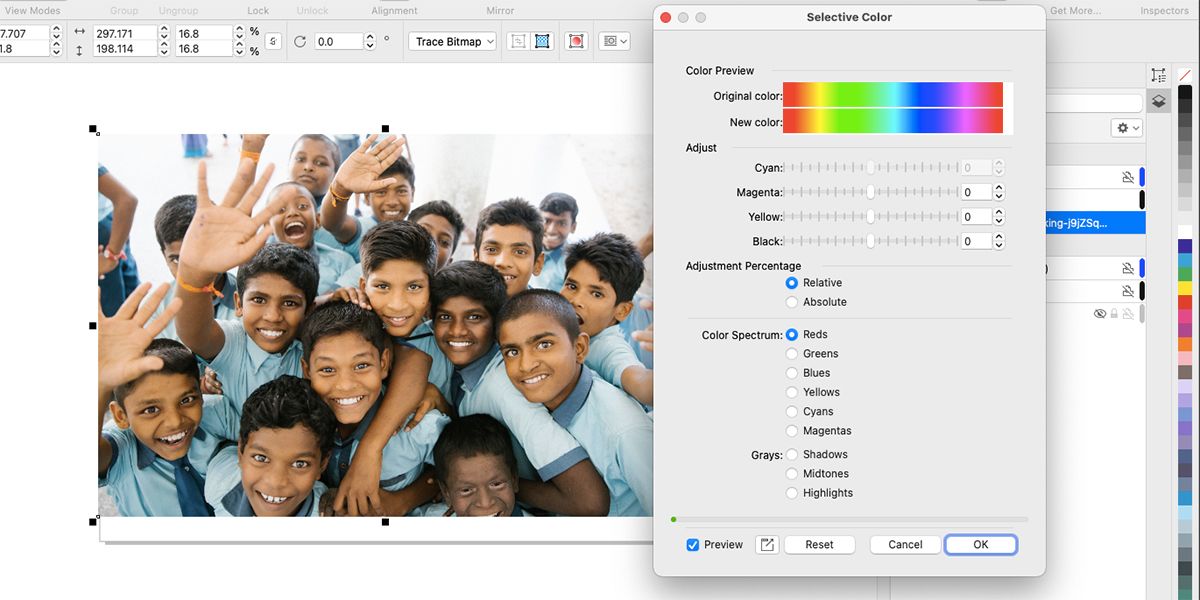
For the first technique, we’re going to use the Selective Color tool. Go to Effects > Adjust > Selective Color. This opens a dialog box with two linear color spectrums, four sliders, and many radio buttons. Select Reset to start from a blank slate.
From the Color Spectrum options, choose a color that aligns with the one you’re changing. We’ll be changing the shirt colors from blue to pink. Since blue hues may fall under both Cyans and Blues, as well as in Greens, we’re going to select the Cyan radio button, to begin with.
With your first color selected at the bottom, use the Adjust sliders to change the hue towards your intended new color range. The colors are in the CYMK—cyan, yellow, magenta, and black—range.

To change from blue hues to red or pink hues, dial down the Cyan slider and dial up the Magenta slider. But play around with the various sliders until you get closer to your intended color. We’ve written about color theory for creative designs which may help you pick the right colors quicker.
Then select a new Color Spectrum button of another similar color, like Blues or Greens if your main color falls in that spectrum. Repeat the process with the Adjust sliders again until you reach your desired result. Click OK.
If you want to switch off your selective color adjustment at any point, hover over the layer and click the Eye icon.
The Selective Color function in CorelDRAW isn’t perfect, and it may have better results using an image with fewer colors in it. Luckily, there is still another technique for changing colors in your images that may give you more control. You can also use Photoshop to replace the color of an object.
Technique 2: Replace Color
CorelDRAW’s Replace Color tool allows you more control than the Selective Color tool; however, it can be a slower process.
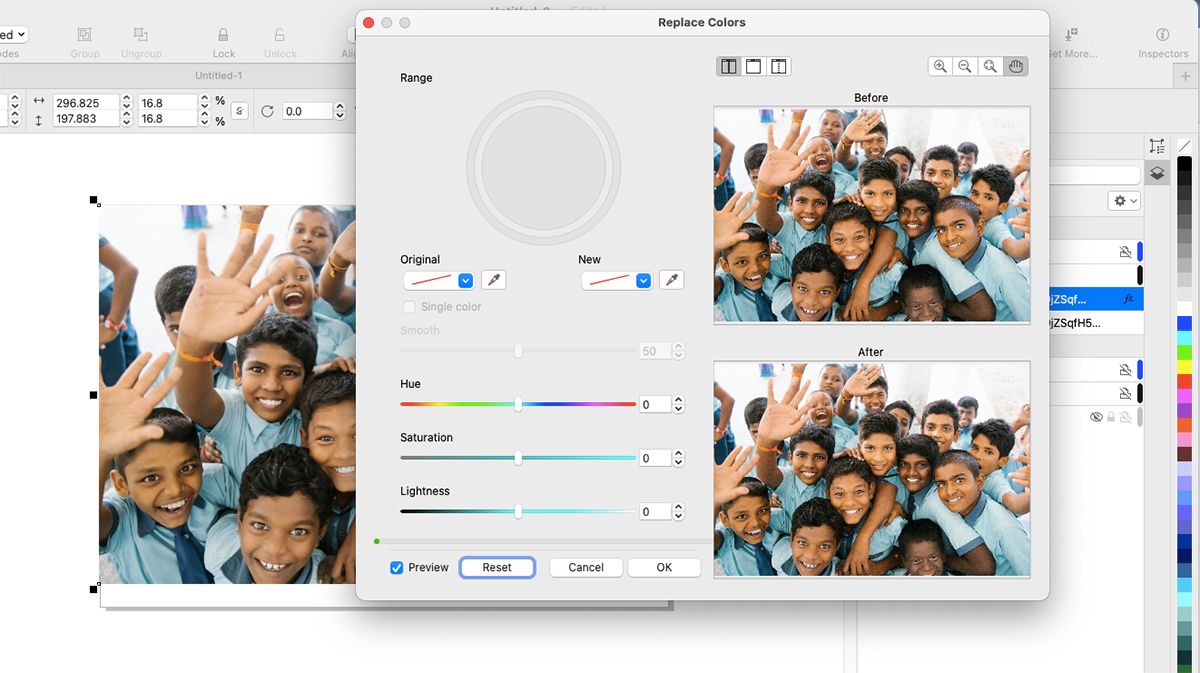
Select your image and go to Effects > Adjust > Replace Color. This brings up a dialog box with Before and After previews of your image. Alongside the preview boxes is a blank color range wheel, an Original Color dropdown, and a New Color dropdown, as well as sliders for Smoothness, Hue, Saturation, and Lightness.
Before starting, select Reset to ensure you start from a clean slate. Use the Eyedropper tool next to Original Color to eyedrop a particular color from your original image. You can sample the color from the larger image behind the dialog box, or from the Before preview image within the dialog box.
Put the eyedropper on a prominent color in your image. If there’s more than one part of the image that displays the same color, they will all change together. For this reason, it’s best to pick a color that only appears on the one object you wish to change.
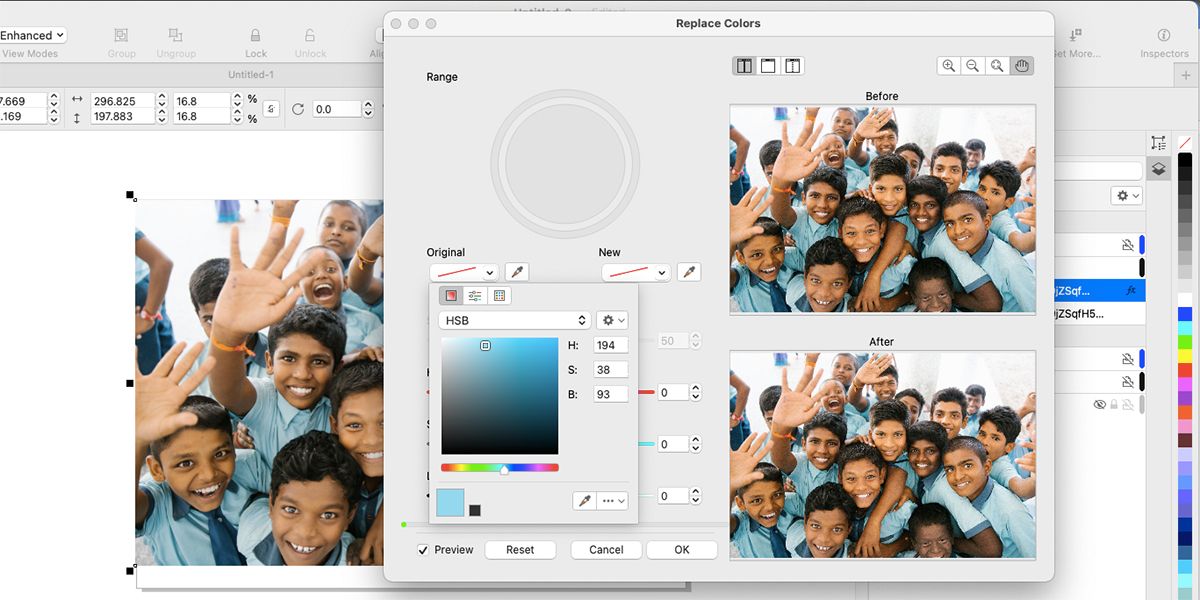
If you don’t wish to use the eyedropper, click the dropdown on Original Color to choose a color from the color spectrum. This technique may have varying results if the color you selected doesn’t exactly line up with the colors in your image, but it will still work.
From the New Color dropdown, choose the color you wish to replace it with. Once selected, you’ll notice the preview images change. The original image will have an under-saturated effect on all the areas Corel thinks the selected color appears. The After preview will replace those areas with your new color. At this point, it may not look very appealing.
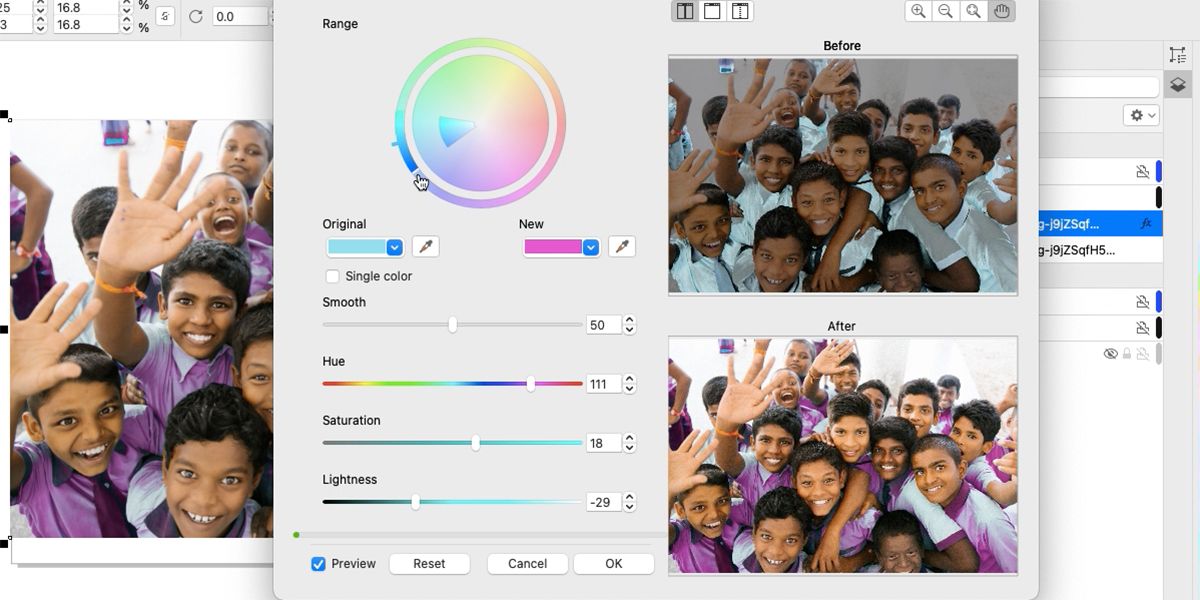
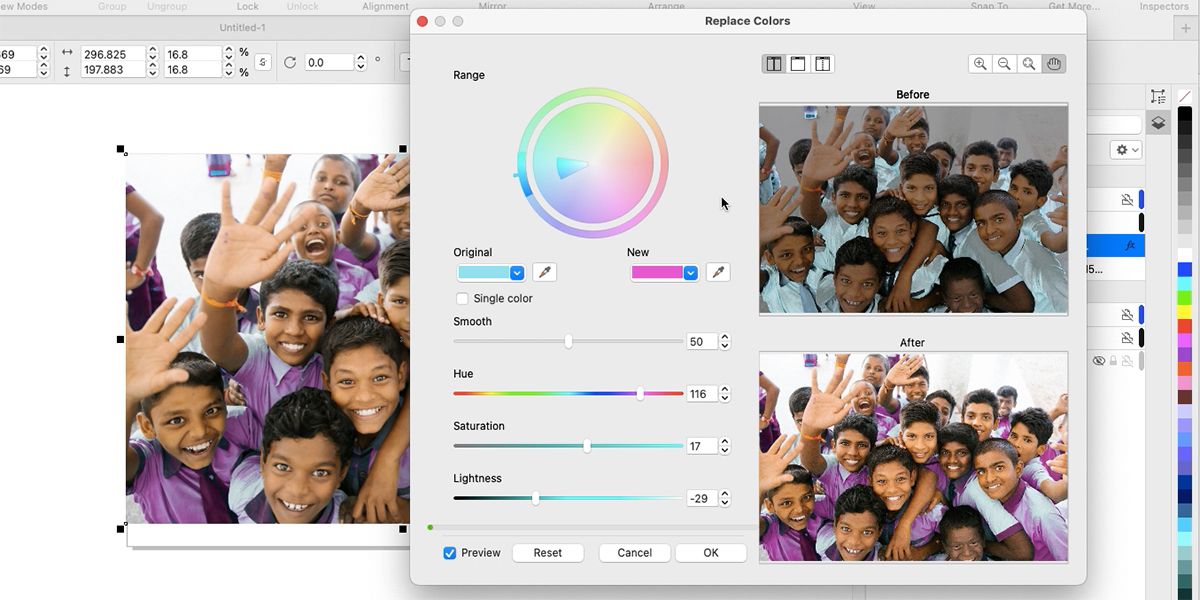
The color range wheel shows a full-color spectrum with a triangular selection of the Original Color selected. To add more hue to the selection, hover your cursor towards the end of the curved line on the outside of the circle until the edge turns white. Then click and drag a little towards the new hue.
This may take a few seconds to register, and you may need to click and drag a few more times. You can do this on either side of the hue section.

To add levels of saturation to your color selection, move your cursor to the curved edge of the triangle until the edge turns white. Again, click just beyond the white edge and drag to increase the triangular area. You may need to do this multiple times to reach the full area you’d like and increase the saturation of the selected area.
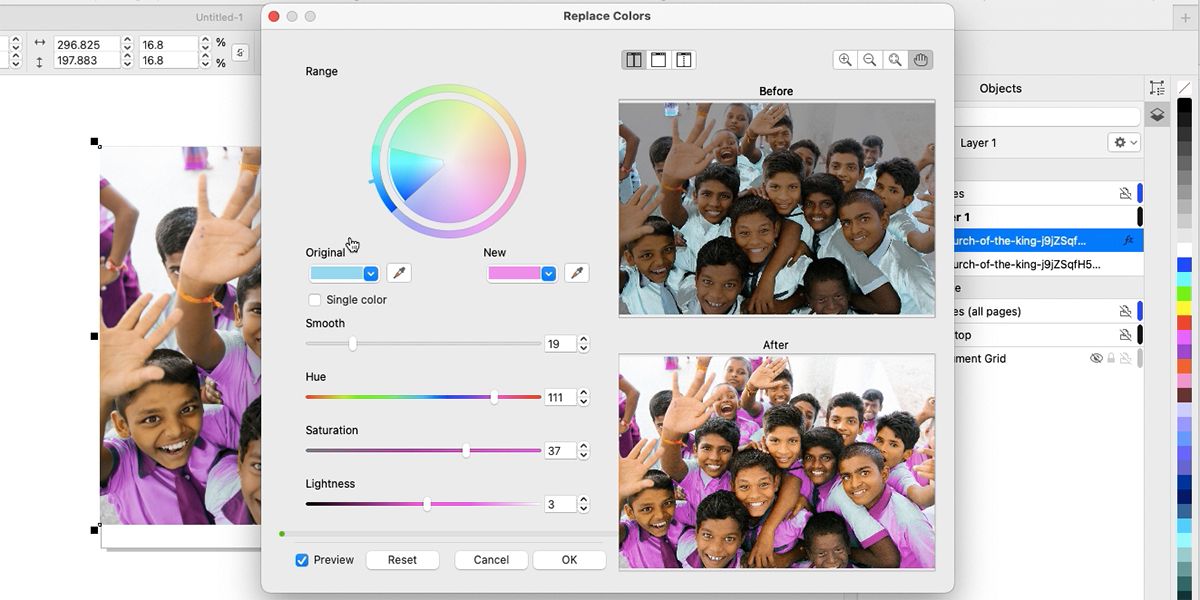
Changing the smoothness levels will affect how much the affected color spreads. A lower Smooth value will give you a tighter selective area which hopefully focuses on the color you want to change. A higher Smooth value will affect more areas or pixels in your photo.
You can change the hue slider if you want to easily change the new color without selecting everything. The Saturation and Lightness sliders also affect how the new color appears, so play around with those to help reach your desired color and effect.
Once you’re happy with the result, click OK to return to the canvas. If you wish to switch off the Replace Color feature, hover over the layer and click the Eye icon. You can easily use this color replacement technique alongside other techniques in your future projects, like removing the background of a photo in CorelDRAW.
Replace the Colors of Any Image in CorelDRAW
Despite CorelDRAW being vector-based software, it is possible to work with bitmap images and change their colors. You can change your subjects in blue shirts to subjects in purple shirts with just a few clicks and a bit of patience.
These techniques work without the grueling task of selecting around your chosen area, which saves you time, and you still get a pretty good result of realistic color replacement.
Опубликовано пт, 25/03/2011 — 22:04 пользователем CorelRU
Редактор CorelDRAW позволяет детально настраивать цвет и тон растровых изображений. Вы легко сможете заменять цвета на изображении, а также настраивать яркость и интенсивность цветов. Инструменты настройки цвета и тона растровых изображений вы сможете найти, перейдя на вкладку «Эффекты» и раскрыв список «Настройка».
Дизайн
Инструменты и настройки
Векторная графика
Серия:
CorelDRAW для начинающих
Содержание
- — Как изменить цвет объекта в Corel Draw?
- — Как в Corel заменить один цвет на другой?
- — Как изменить цвет объекта контура объекта в Corel Draw?
- — Как изменить цвет абриса в кореле?
- — Как выбрать все элементы одного цвета в Corel Draw?
- — Как в Corel Draw изменить CMYK на RGB?
- — Как преобразовать контур в объект в кореле?
- — Как поменять цвет таблицы в кореле?
- — Как изменить цвет текста в Corel Draw?
Как изменить цвет объекта в Corel Draw?
Выберите пункт Растровые изображения Растровая цветовая маска. Выберите цвет в списке маскированных цветов. Нажмите кнопку Изменить цвет . Для изменения цвета используйте элементы управления в диалоговом окне Выбор цвета.
Включите параметр Определенная цветовая палитра в области Найти и выберите цветовую палитру из списка. Выберите цветовую палитру для замены в списке Заменить на. В области Применить к установите один из флажков, чтобы указать, где применить замену цвета. Нажмите кнопку, чтобы найти или заменить.
Как изменить цвет объекта контура объекта в Corel Draw?
В наборе инструментов выберите инструмент Контур . Выберите объект контура. На панели свойств щелкните Цвет заливки и выберите цвет.
Как изменить цвет абриса в кореле?
В области фонового цвета текста нажмите кнопку Параметры заливки и измените параметры в диалоговом окне. В области цвета абриса нажмите кнопку Толщина абриса и выберите необходимый параметр в списке. В области выбора цвета абриса текста щелкните палитру Цвет абриса и выберите цвет.
Как выбрать все элементы одного цвета в Corel Draw?
Щелкните инструмент Указатель , затем нажмите клавишу Tab один или несколько раз, пока вокруг объекта, который требуется выделить, не появится область выделения. Выберите Правка Выбрать все Объекты.
Как в Corel Draw изменить CMYK на RGB?
Как в CorelDraw разом заменить все CMYK цвета объекта на RGB: Делается это с помощью Мастера замены. Нажимаем «Правка», далее «Поиск и замена», далее «Заменить объекты». Появится окно «Мастер замены».
Как преобразовать контур в объект в кореле?
Для того, чтобы преобразовать контур объекта в самостоятельный объект, нужно выполнить команду Arrange → Convert Outline To Object (Компоновать → Преобразовать Эскиз в объект). После этого контур превратится в обычный объект.
Как поменять цвет таблицы в кореле?
На панели свойств нажмите кнопку Выделение границы и выберите границы, которые требуется изменить. Выполните любую задачу, описанную в следующей таблице. Выберите ширину рамки в списке Толщина абриса на панели свойств. Щелкните палитру Цвет абриса на панели свойств, а затем щелкните цвет в цветовой палитре.
Как изменить цвет текста в Corel Draw?
Выделите текстовый объект с помощью инструмента Pick Tool (Выбор) или выделите фрагмент текста с помощью инструмента Text Tool (Текст). Щелкните левой кнопкой мыши на каком-либо образце цветовой палитры. Цвет заливки текста будет изменен.
Интересные материалы:
Где смайлы в Инстаграм?
Где смотреть 4к фильмы на смарт ТВ?
Где смотреть Телеграм каналы?
Где снималась Верона?
Где собирают Samsung A50?
Где собирают Самсунг а71?
Где собирают стиралки Бош?
Где содержится магний и цинк?
Где сохраненные в инстаграме?
Где сохраняется документ в ворде?